APAS DIGITAL VIDEO CAPTURE
PROCESS
February 2000
Introduction
The following instructions describe the installation and capture process using the
SIIG 1394 DV-CAM KIT hardware and ULEADVIDEO STUDIO 3.0 software for use with the Ariel
Performance Analysis System (APAS)/Microsoft Windows 98-Second Edition computer systems.
REQUIREMENTS
The following hardware/software is recommended for Digital Video capturing/editing.
a.Pentium II 333-MHz
computer (or equivalent)
b.At least 64 MB RAM
c.CD-ROM drive
d.200 MB of available
hard disk space
e.Video Card with 8
MB RAM (PCI or AGP)
f.Windows 98 Second
Edition or later.
Installation
Hardware:
Follow the directions outlined in the SIIG 1394
DV-Cam Kit User’s Manual. The SIIG 1394 hardware is fully compliant with PCI Plug-n-Play 2.1.
Software:
1. (where X is the
CD-ROM drive letter).“OK”
and click on X:\Utility\Setup\Autoexec.exeType in
.Run, and
then StartInsert the software
CD into the CD-ROM drive. Click on
2. software, double-click on the
Read Me icon in the Ulead VideoStudio startup menu.Ulead VideoStudioFor additional information on the utilities that are also located
on the CD.Quick Time 3.0 and Netshow Tools
3.0It is recommended to install and
follow the on-screen instructions to complete the installation.“Install Ulead VideoStudio 3.0”Choose
Additionally, these systems have tested the DV capture hardware and software for
correct operation.
APAS
computers, with the DV option, purchased directly from Ariel Dynamics, Inc. already have
the hardware installed and the software options configured. :NOTE
Digital Video Capture Process
1.The camcorder should
be recognized by the system. mode (the DV tape should already be
inserted in the camcorder). Connect the other end of the DV cable to the IEEE 1394
Firewire capture board.PLAYConnect the 4-pin
connector of the 1394 DV cable (i.Link cable) to the camcorder and power on the camcorder
in the
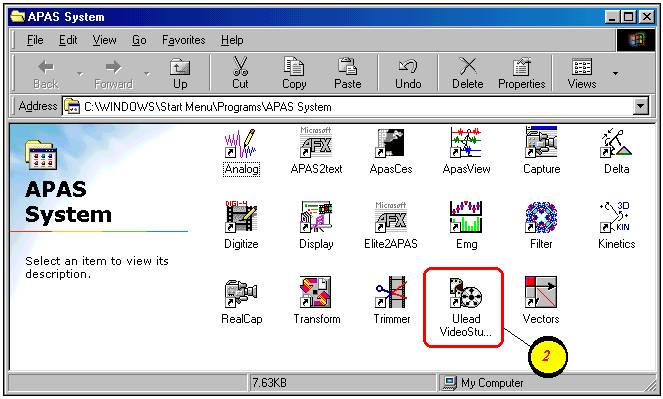
2.This will open the UleadVideo Studio capture/edit
software. Double-click on the
UleadVideo Studio icon located in the APAS-System folder (or on the Windows desktop).
13.The next step is to
“trim” the captured video using the Ariel Trimmer module.

 in the upper right corner of the display to
close and exit the Ulead VideoStudio program.XClick the
in the upper right corner of the display to
close and exit the Ulead VideoStudio program.XClick the
a.
12.Exit the Ulead
program
11.For
example, if the project is named DISCUS, the captured video files would be named
disc001.avi, disc002.avi etc…The user may choose to rename these files with a more
descriptive name prior to performing the digitizing process. The captured AVI files
are labeled sequentially (using the first 4 letters of the project name) and are stored in
the location specified in Step # 5b. Select the CAPTURE
menu located at the top of the screen and repeat steps 6 through 10 to capture additional
camera/control views.
b.The Raw DV file will be
compressed during the “trim” process in the Ariel Trimmer module. recommended for
APAS analysis.NOTThis process results in a smaller
size video file, but is The Ulead VideoStudio software provides the “Make Movie” option to
compress the Raw DV file using the compression codec specified in the Global Options
template.
The video is saved in Raw Digital Video (DV) format.
buttons.Save As or SaveSave the video file by selecting either
the
a. menu located in the upper right corner of
the display.FINISHSelect the
10.Save the captured
video file.
9.
button to stop the videotape.STOP or PAUSESelect the
8. key on the keyboard to stop the capture
process.ESCPress the
c.” option.Enable Press
OK To Capture tab
and then activate/deactivate the “Ulead VideoStudio key on the
keyboard, select the F6If desired, this menu can be toggled on
or off by selecting the button to begin capturing video to the hard
disk.OKSelect the
b.This will start the image capture. Video button prior to the desired starting
point.CAPTURESelect the
a. button to start the videotape.PlaySelect the
7.Begin the Capture
process.
6.However,
the image can be viewed directly from the camcorder LCD display or by using an external
monitor connected to the S-Video Out connector on the camcorder. The recorded image will not be displayed on the
Ulead monitor until the Capture button is selected. NOTE:
the video.PauseThen Use the mouse and
click the VCR buttons to position the videotape prior to the desired starting point.
d. button to proceed.OKSelect the
c.Refer to step
#4 above for instructions on changing the template/codec settings. with either the Indeo 5.04 codec or the
Morgan Multimedia MJPEG codec.
AVI, 720x480 resolution, 29.97fps, DV, NTSC The recommended
template for the JVC GR-DVL9500 digital camcorder is Select the template
with the desired settings.
b.In this case, the E: drive has been reserved for storing the video files. The hard disk drive on computers supplied by Ariel Dynamics is partitioned into
several logical drives.
:NOTE
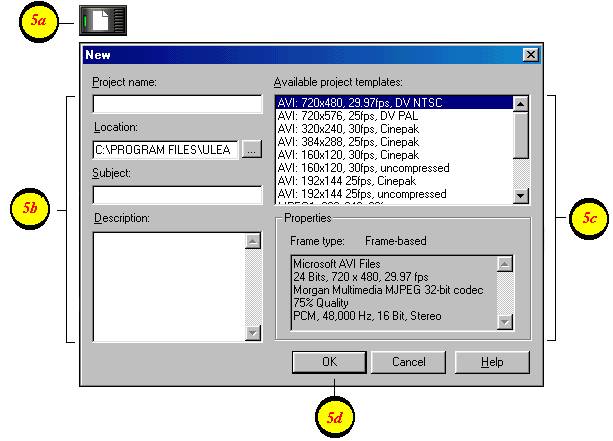
Type the name,
subject, path and any other descriptive information.
5. icon.New ProjectSelect
the
a.
Create a New Video
Project.
f. button to proceed.CLOSESelect the
e. button to return to the Templates Manager menu.OKSelect the
d.The recommended codecs are either the Indeo 5.04
codec or the Morgan Multimedia MJPEG codec The user can also adjust the compression
quality at this menu. tab and select the desired codec.CompressionSelect the
c. button.EDITClick on
this template and then select the .AVI, 720x480
resolution, 29.97fps, DV NTSCThe recommended template for the JVC
GR-DVL9500 digital camcorder is
b. commandTemplates ManagerSelect the
a. Commands button to make any changes to the
selected template.GlobalSelect the
4.Once
the desired codec is set, it remains in the template until changed by the user. Change the selected
codec. This step is only required a single time.
d. to proceed.OKSelect
c.The camera must be powered on and connected,
otherwise, this driver will not be available. :NOTE This will allow the VideoStudio software to
communicate directly with the JVC camcorder by utilizing the VCR-like buttons. from the drop down list of capture drivers.MS
1394 Device ControlSet the Current
Device to
b.Control DeviceSelect
a. Commands buttonGlobalSelect
3.Once the Device control is set, the
device control remains in memory until changed by the user. This step is only required a single
time. Set the Device
Control.